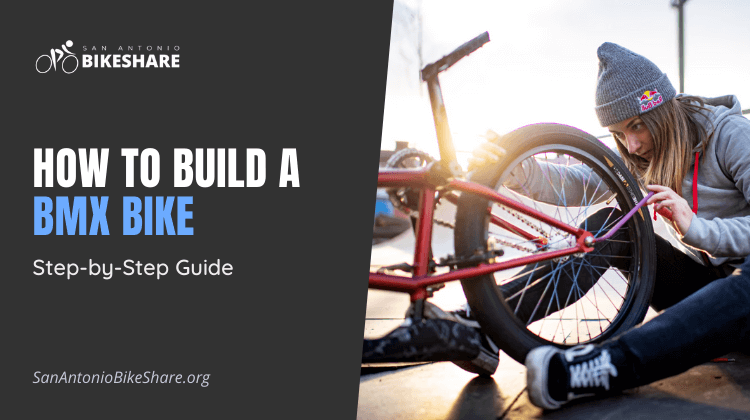
How to Build a BMX Bike | Step-by-Step Guide
Are you ready to build up your game by creating your own BMX from the ground up? Let’s learn how to build a BMX bike from scratch.
Building your own BMX is a challenging undertaking, but the end result is well worth the effort. That’s why I’ll take you step by step through the entire process so you can build your own BMX bike.
So, as a seasoned rider, you’ve tried every basic maintenance method known to man, and the do-it-yourself stuff isn’t cutting it anymore. A standard BMX bike does not, either.
Are you willing to put yourself to the test?
Learning to build your own BMX bike is a significant accomplishment for a BMX rider. Even the best BMX bikes have limits, but you get to set your own when you build your own from the ground up.
I’ll see to it that you’re taken care of. I’ll go through everything I wish I’d known before building my first BMX bike in this essay. Even the most courageous beginners are welcome to join since we provide all of the necessary tools and bike components, as well as guide you through each stage of the procedure.
Whether you want to completely rebuild your bike or just replace a few parts, customizing bikes is well worth it and easier than you might imagine.
Let’s start!
How to Build a BMX Bike on Budget?
Are you positive you’ll have enough money to finish the project before you start? You must first decide if you are replacing a single component or building a complete bike. Each component’s price varies depending on whether it’s new or used, as well as the brand and type.
The bike will cost roughly $1700 to build from the ground up, depending on how high-end you want to go or if you prefer inexpensive BMX bikes. It’s also a good idea to double-check that the pieces fit the bike.
If you want to build a BMX bike on a tight budget, I recommend starting with old parts and gradually improving until you have a brand new bike. Use a few high-quality parts on items that are vital to you to save money.
What Do You Need to Build a BMX Bike?
The below-mentioned parts and components are required to build a BMX bike.
Main Bike Body
- BMX bike frame
- Fork
Bearings
- Bearing race
- Bearing
- Top bearing
- Top cap
- Spacer
- Gyro Piece
- Top gyro plate
Stem, Handlebars, and Seat
- Stem
- Handles bars
- Stem bolt
- Seat and the seat post
- Seat clamp
- Micro-adjust
Bearings and Axle
- Bearings x2
- Axel
- Washers x2
- Axel nuts x2
Crank
- Crank bearing spacers
- Cranks
- Sprockets
- Crank arm
- Crank Spacers x2
Pedals and Sprockets
- Bolts for pedals x2
- Sprocket bolt
- Two sets of complete wheels
- Socket pegs
- Primo Jewels x2
- Washers x2
- Sockets x2
- Back sprocket
Chain and Brakes
- Chain
- Chain tensioners x2
- Primo jewels or Axel nuts x2
- Washers x2
- Brake lever x1/2
- Brake arms x2
- Brake cable
- Tri-flow
Optional Tools
- Grease
- A tool kit
- Old rags
- Bike stand
How to Choose Bike Parts
If this is your first time building a bike, the sheer quantity of BMX parts available and how to choose the correct type, material, and price point may be overwhelming.
BMX Bike Frame
The bike frame, like the rest of the bike’s skeleton, is possibly the most important component. It also happens to be the bike’s biggest component.
BMX bikes come in a variety of shapes and sizes since geometry and size have a direct impact on the bike’s performance. When it comes to BMX bikes, you must decide if you want to build a freestyle or a race bike, as the two have different geometry.
The top tube length, standover height, chainstay length, and bottom bracket height, as well as the angle of the head tube and seat tube, must all be taken into account while designing the frame. Depending on your personal tastes and body type, take into account whether you’ll be skating on the street, on-ramps, on trails, or on flatland. The weight and material of the frame, as well as the angles of these various points, can all have an impact.
Aluminum, Chromoly, Hi-ten steel, and carbon fiber are among the frame materials that can be used. Lightweight materials like aluminum (which is less expensive) and carbon fiber are perfect for BMX racing because it requires speed (strong and more expensive). Steels such as Chromoly (more expensive) and Hi-ten steel are ideal for freestyle and jumps (cheaper).
BMX Fork
Because it absorbs the majority of the impact during landings and leaps, the fork is intrinsically related to. A fork with Investment Cast dropouts, offset, taper, and butting of tubing, as well as heat treatment, is available. You can save money by using a stronger material for the fork than the rest of the bike.
BMX Stem
The weight distribution of the bike is affected by the stem, which differs depending on whether you’re doing BMX racing or BMX freestyle. You must choose between a top-loading, front-loading, or drop-down stem. It might be heavy and powerful, or it can be light and swift.
The overall feel of the bike is also affected by the reach rise and stack height. A top load stem with taller bars is preferred by many riders. You should also take your height and arm length into consideration, as well as try on several styles to see which you prefer. Because a BMX stem will be under a lot of weight and pressure, it’s best to avoid stems with a lot of cuts and machining.
In a grassy setting, a close-up of a grey road bike.
BMX Handlebars
Bike handlebars are a great place to start if you’ve never done any DIY before. Changing the handlebars on a BMX bike is a fun option because you can play with different sizes, shapes, colors, and features. They come in two or four-piece sets.
BMX Headset
A sealed integrated head tube and sealed integrated headset might make all the difference when it comes to modernizing your bike. You can have a standard head tube with loose ball bearings and forced-in headset cups. On BMX bikes, the head tube and headset are typically combined.
The good news is that it’s simple to install, and if properly maintained, the sealed bearings should last a long time. Dust caps are available in a range of shapes and sizes to assist close gaps and improve aesthetics.
BMX Bike Pedals
The exciting part is about to begin. Changing the shape, grip, and color of your pedals is a quick and easy method to personalize your bike without making a significant difference. BMX pedals can be made of plastic/polycarbonate (PC), nylon blend, or metal, such as 6065 or 7075 aluminum.
There are additional options for sealed and unsealed pedals, as well as different bearing types. Of course, plastic is the cheapest because it wears out faster, but it also hurts less when your shins hit it! Plastic bearings and bushings are frequently not sealed to save money.
The best option for grip is metal pedals. They’re also more durable and endure longer. Some pedals contain replaceable pins, allowing you to avoid replacing the complete pedal. There are two types of bearings: unsealed bearings, which are less expensive, and sealed bearings, which are more costly.
Plastic pedals offer the best of both worlds because they are lighter and less expensive, as well as have interchangeable metal pins to extend their life.
Pegs and Grips for BMX Bike
If you have a BMX bike but haven’t thought about updating the grips, you’re missing out. BMX grips come in a variety of styles, including flanged and flangeless, as well as different designs, lengths, and rubber options, as well as different colors. Aluminum metal pegs, as well as plastic pegs with a steel core and nylon composite sleeves, are available.
BMX Seat and a Seatpost
The four main styles of chairs are pivotal, tripod, railed, and combination. A traditional pivotal with a bolt running through the top or a stealth pivotal with the bolt running through the bottom for a more streamlined look are both available. Pivotal is more adjustable because of its multiple teeth, allowing you to angle it to your desire.
The tripod is more basic and lightweight, with only a little bolt and two angles to place. Combo seats have a single seat post and one angle. Because they are heavier and less flexible, railed seats are less common. Seats are available in a range of colors and forms, as well as thin, mid, and fat cushioned options.
BMX Crank
Two crank arms and a spindle are the most common components of BMX bikes. Cranks with 19mm, 22mm, and 24mm spindles, as well as cranks with larger spindles for city riding, are all available. To reduce bolts, a BMX sprocket with spline drive can be utilized with a 48 spine spindle.
Bike Tires for BMX
A smoother tread pattern with a larger width and higher TPI is ideal for street riding. Ramp riders will want smoother, narrower tires with a higher PSI. For trail riding, tires with higher tread and width are preferable. The PSI ratings on the wheel range from 60 to 120, with widths ranging from 1.95′′ to 2.40′′.
BMX Bike Hubs and Rims
Axles, bolts, washers, cones, and drivers, as well as color variations, are available in male and female axle hubs manufactured of Chromoly, aluminum, and titanium metals. There are double and single wall rims, as well as wide rims with shorter sidewalls and narrow rims with taller sidewalls.
Conclusion
Rather than buying a whole bike from a local bike store, consider building one yourself. From the back wheel to the pivotal seats, you’ll have complete control over the bike. You’ll have the option of reducing rolling resistance, pedaling backward, or using the front brakes.
A complete BMX will contain pegs for stunt maneuvers. If your current bike isn’t cutting it, consider building your own. You also have influence over the bike’s production costs because you may pick whether to change it piece by piece or build it from the ground up.
True, buying a bike from a shop is far more convenient, but all riders can profit from using their DIY skills.